Just a quick reminder: My designs and I will be at the Windsor Button in Boston TOMORROW, August 29, from 1 to 4 in the afternoon. There will also be patterns and t-shirts! I'm looking forward to meeting some rad Boston-area knitters!
August 2009 Archives
Well. David and I are starting to recover from our spate of bad luck, despite ANOTHER anxiety-producing few days in which we had to hospitalize Mr. Bingley in order to help him recover from a gastrointestinal disaster of the first degree. He's home now, back to his good old self, and we're sleeping ten hours a night and spending some well-earned time just vegging out. Which means that my Kim Hargreaves jacket is coming along nicely:
I've been remembering a lot about why I so enjoy her patterns, and I thought I'd do the promised breakdown of Top Five Reasons I Love Kim. I warn you, it gets a little epic.
1. Fit: The absolute most inspiring thing to me about Kim Hargreaves's patterns is her thorough and masterful understanding of fit. Many of her designs aren't showy; they feature simple stitch motifs, and aren't immediately astounding on a technical level. But what really gets me is her evocative garment shapes, and the confidence with which she achieves them. With just a delicately bell-shaped sleeve or a carefully-controlled hemline, she can conjure up a whole story in my mind about the character and time period of the wearer. I think careful attention to fit is the mark of a designer who really takes pride in his or her work, since it doesn't provide the initial "wow!" factor of a showy cable or lace motif. But good fit does make for classic, eloquent garments that stand the test of time. In this particular pattern, I've been impressed with two specific things:
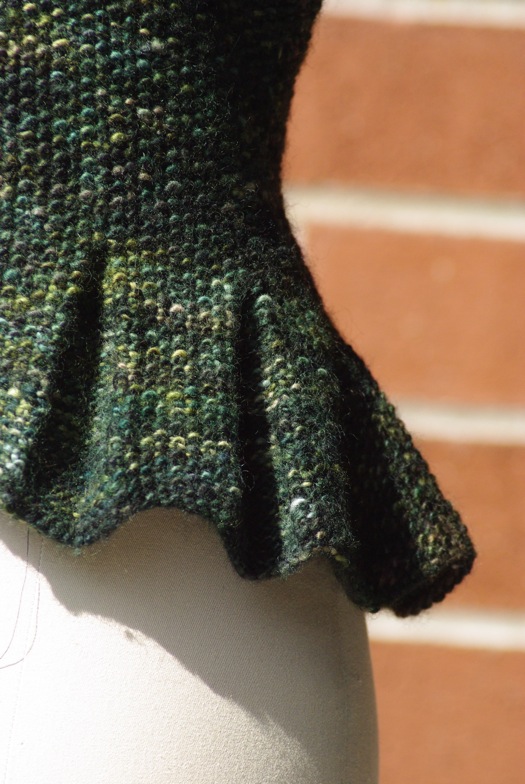
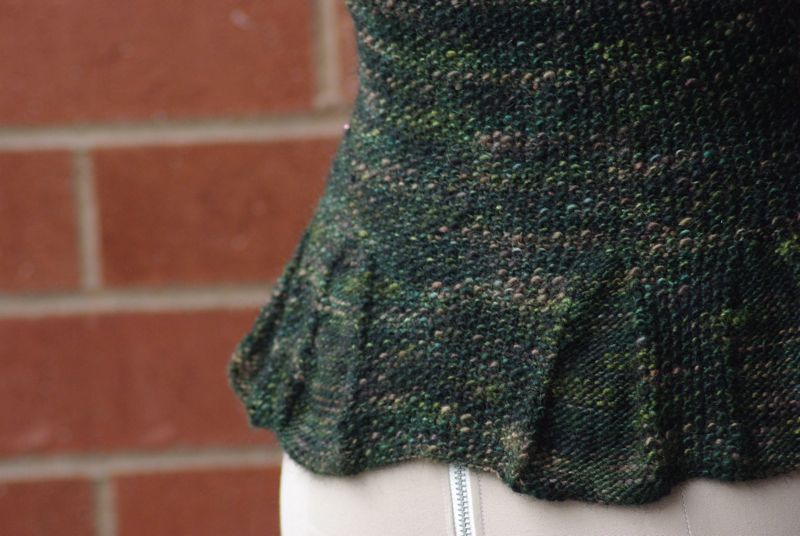
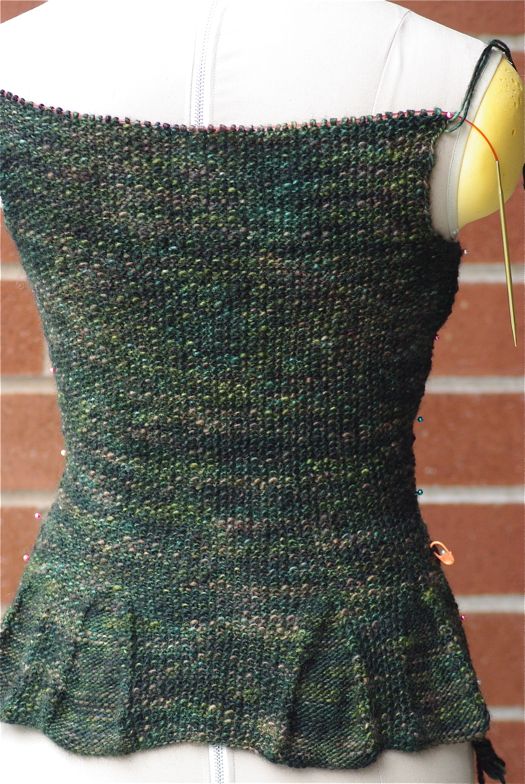
- She doesn't overdo it. The shaped peplum in the back of this jacket looks quite dramatic, yes? But the short-row shaping only adds about an inch to the length of the center back. I would have thought that more of a difference would be required from back to front in order to create that equestrian shape, but as it turns out anything more than an inch would have been overkill. Way to go, Kim.
- At the same time, she's not afraid of dramatic shaping when it's called for. The sides of the peplum here decrease so dramatically that even I, who love waist shaping, was getting a little nervous. But I adore the fit-and-flare look that's emerging, so more points to Hargreaves for knowing when to be subtle and when to be daring.
2. Succinct language. This may be controversial, but I LOVE the relatively condensed nature of Hargreaves's pattern instructions. When describing how to set the flounce for the peplum, for example, she writes "moss st X, pX" (where X is the number of stitches). A more beginner-friendly (and American-friendly) way of putting this would be to spell out what she means by "moss stitch": "(K1, p1) 4 times, k1, pX." Similarly, when instructing to increase or decrease for the waist shaping, she writes to "patt to last 2 sts, patt2tog," not specifying what type of decrease she'd recommend using. Although I know that many beginning knitters prefer to have every detail spelled out, I find this condensed style MUCH easier to follow, because it makes the larger pattern more obvious. Working the peplum is actually very easy, conceptually: you just seed stitch x, px, seed stitch x, px, seed st to last 2 sts, decrease 1. Written this way, it's easy to grasp where Hargreaves is going with the pattern: there will be panels of seed stitch alternating with panels of purled stitches, and the purl panels will be gradually decreasing along with the side edges. Written in a clunkier, more expanded fashion, the pattern might be easier for novices to follow along note-by-note, but it would be much more difficult to grasp the larger picture of WHY the designer wants you to work these particular stitches - and that, in turn, makes it harder to spot and correct mistakes. I think this is a complicated issue, and I myself try to err on the side of providing more information rather than less. I certainly want to encourage beginning knitters, rather than alienate them. But I also think there is a place for patterns developed with the more advanced knitter in mind, and that the best way to write them is in this kind of condensed, big-picture language.
(As a side-note: I do think that the pattern would have benefited from a definition of "moss stitch" in a pattern note, since Americans define that stitch differently than Brits.)
3. Attention to detail. At the same time, Hargreaves's ability to communicate the larger plan never means she's neglecting important details. For example, she notes in the peplum directions that, when beginning a moss/seed stitch section, the knitter should always start with the same stitch that ended the last seed section (for example, if you ended the last seed panel with a purl stitch, you should start the next seed section with a purl stitch as well). This is because, when you get to the top of the purl panels and are about to pattern 3 together to make their upper point, you want the resulting stitch to meld seamlessly into the seed stitch body. In order for this to happen, it has to be surrounded by two stitches of the same type, so that you end up with either k-p-k or p-k-p, rather than, for example, k-p-p. I love that she describes how to ensure this result in a general pattern note, rather than figuring out whether each specific size should start on a knit or a purl stitch and thereby complicating the instructions. The end result combines ease of understanding with elegance of language. Brava!
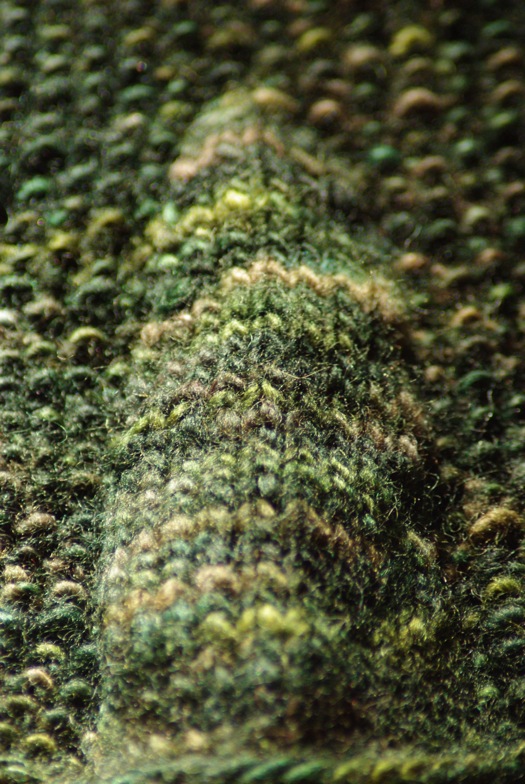
Another pleasing little detail can be found in the decreases of the purl panels: Hargreaves has the knitter p2tog, then work to the last two stitches in the panel and p2tog through the back loop. This is such a satisfying, knitterly detail; working another plain p2tog would look nearly identical from the right side of the fabric, but from the wrong side her directions create two beautifully symmetrical lines of decreases to the left and right of each stockinette triangle.
4. She is not afraid of finishing. Here comes another possibly controversial statement: I think the knitting world has become too wary of finishing. Top-down raglans are all very well, and I know that people are scared of seaming. But y'all, it's time to face your fears, because finishing is your friend. Most Hargreaves designs feature bottom-up constructions complete with side-seams - a method that has come to seem somewhat old-fashioned in this era of top-down seamless mania. And you know, there are great things about other construction methods, but I feel strongly that IN GENERAL, seams make a huge difference in how well a garment stands up to wear and tear over time. This is especially true for fat folks or people with big frames. Seams help a garment keep its shape, prevent it from stretching out, and help define its borders to begin with. I applaud designers that continue to use them, and knitters who are willing to learn how to make them.
And finishing is not just about seaming. Rowan and Kim Hargreaves both provide blocking and seaming instructions in the appendices of their collections, and Hargreaves is not afraid of designs that require precision blocking. Honestly, those peplum flounces looked pretty wonky before a solid, multi-part steam block. (I steam-pressed the curl out of the reverse stockinette sections, then folded the fabric along both seed/stockinette boundary lines, with the reverse-stockinette section folded inside, and steam blocked the folds in place, once from each side. For less crisp, more rounded look, I would then hang the garment up and steam the folds until they soften up, but steam wouldn't help if I hadn't done the initial blocking.) Not to sound too preachy, but if there's any set of techniques I would strongly encourage all knitters to learn, it's finishing: it really does make the difference between a durable, polished-looking garment and...one that's not. :-) And I admire Hargreaves for making the most of creative finishing applications, as I think it's an area ripe for exploration.
5. The details of her aesthetic. Having taught myself to knit with Kim Hargreaves designs (specifically Rowan's Vintage Knits), I was kind of shocked when I moved to other designers and started encountering such developments as the bulky rectangular tunic and the 10-inch armhole. I know I'm hopelessly old-fashioned, but for myself (not passing judgment on anyone else's preferencs), I prefer styling details often associated with mid-century vintage: high armholes (I like 8 inches or even 7.5), a tailored silhouette, close waist shaping, not a lot of positive ease. I'm relatively short, so eliminating extra fabric side-to-side makes the most of what limited height I've got, and I'm always a sucker for vintage charm. This isn't a benefit unique to Kim Hargreaves: everyone has their own favorite designer, whose sizing measurements and styling details match up with the look each knitter is chasing. But whoever that is for you (and for me it's Hargreaves), it's such a luxury to have found them, and feel confident that other patterns of theirs are likely to live up to your expectations.

David and I were supposed to leave for New Hampshire yesterday, but we are still at home. Why? Well, it turns out that on top of the car accident and the lost day job, the fates also decreed that our building would be broken into twice over the course of two days, and my brand-new bike would be stolen. And also that Mr. Bingley would come down with some kind of stomach ailment and run around throwing up all over the house. So we pushed back our departure in order to get the security and health issues sorted out before flying all the way across the country. (Not to worry, though: unless some other, unforeseen catastrophe hits, we will still be in Boston for the trunk show on the 29th.)
So, not to indulge in a pity party over here, but I am SO EXHAUSTED by everything that's happened over the past two months. Seriously guys, so very, very tired. As in, wake up at 9, then nap from noon to 3 tired. I'm deeply in need of some down time, hours and days in which nothing is expected of me and I am not dealing with crisis upon crisis, planning a huge project, or even being held responsible for dinner. Just...time to relax.
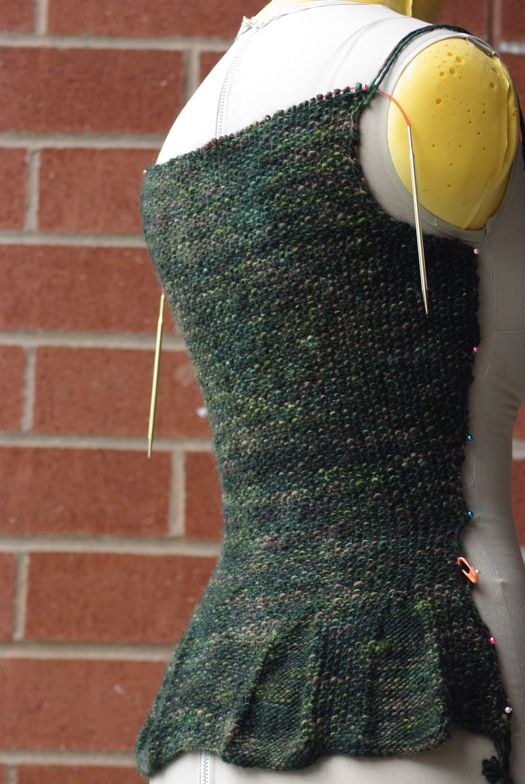
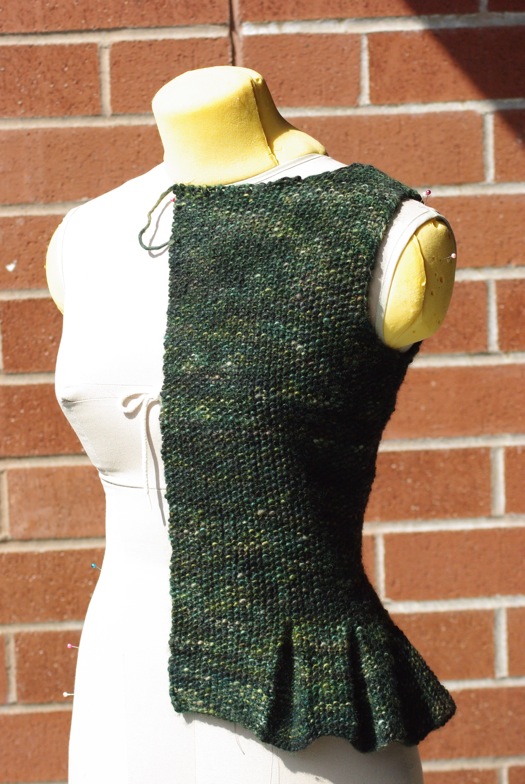
So I've decided to indulge in a major personal luxury and knit someone else's pattern while I recover and continue working up the accessory patterns that we're releasing in the fall. I hardly ever do this anymore, but when I do I always find it useful. I'm drawn to patterns featuring intriguing techniques or shaping I'd like to dissect (and perhaps transform into something I can use in my own designs!), and following a really well-constructed pattern is always such a good reminder of how to write one myself. In this case, I'm returning to an old, old favorite: this is the back of Kim Hargreaves' lovely Darcy jacket, worked in Manos del Uruguay in a beautiful variegated green, and only a bit modified to accommodate a slightly larger gauge.
Kim Hargreaves and Eunny Jang are the designers who inspired me to try my hand at putting together knitwear in the first place, and their patterns are still an endless source of inspiration for me. I adore all the shaped short-row peplums in Kim Hargreaves's Heartfelt collection, and I'm excited to finally work through one for myself. In fact, in addition to welcoming the ease of working Someone Else's Pattern, I'm generally excited to be back in Kim Hargreaves's world. I really love the way she writes her patterns; they just gel with my mindset, somehow. In fact, I'm planning to do a few posts on the actual pattern and all the things about it that work for me (and maybe the one or two things that don't). Sort of a play-by-play pattern appreciation and consideration society, and a chance to think about what I look for in a knitting pattern.
This yarn has an interesting history: it was originally purchased by my mom, in my junior year. Of HIGH SCHOOL. She was planning a sweater for me as a high school graduation present, and was actually about a third of the way through a pretty cabled pullover when life got in the way and the project was stabled. Then she tried to resuscitate the project when I was about to graduate from college, but realized that she didn't have quite enough yarn for the sweater she'd started, and that her gauge had probably shifted in the five years since she stopped knitting, and in any case that the size she had begun knitting to fit my high school body would probably be a bit tight now that my, uh, "assets" have matured. So the sweater pieces were stashed away again, and when I started the Family Trunk Project, she offered it to me instead. Thanks, Mom! I think the seed stitch really shows it off nicely.
So that's what I'll be working on as I fine-tune and format the rest of the accessory patterns - the third of which will be posted pretty soon. Wish me luck on recouping some serious ENERGY in the coming week, y'all.
As you may know, during the past week the Pacific Northwest has reached and maintained a level technically known in the industry as "OMG too damn hot." We're back into the 90's now, which is still WAY hotter than we are used to over here, but before a few days ago we had almost a week of 105+ degree weather. The entire Portland metro area becomes very cranky and reactionary when we get this kind of heat, or else melts like a an ice cream cone flavored with delicate little flowers. And yes, I know we're wimps. It's just the way we were made. I have a number of knitting projects to show off, but not only have I not wanted to touch anything like wool in this kind of weather; I haven't even wanted to look at photographs of the stuff.
So we at Family Trunk Project turned our crafty energies into something more heat-appropriate. T-shirts!
I'd never tried silk-screening before, but I've always been drawn its happy balance of do-it-yourself-ness and capacity for making lots of prints. (Yeah, I plan to get into letterpress one of these days, too. I'm just that kind of dork.) So David and I decided to try our first silk-screening project: making Family Trunk Project t-shirts, featuring the pattern tree screened onto the front of a vareity of shirts, in a variety of colors..
Our experience with silk-screening was that, if you don't already have a garage full of random stuff that will come in handy, the VAST majority of time on your first project will get eaten up in schlepping around town collecting different materials. Walking back home after visiting the Kinko's near our house to make the transparency used in creating our screen, I observed that apparently making t-shirts consisted largely of visiting different stores and buying...stuff. This was especially obvious to us since we are currently carless, so we either bussed or biked to the Screen & Sign shop, the art store, the supermarket, the photo store, the thrift shop, a different art store, the copy shop, and the hardware store. I think a lot of people would start out with more equipment than we had, though. We even had to buy a garden hose!
That said, our experience with silk-screening is ALSO that it's super-fun once you have all the necessary stuff. The process of collecting all the gear took probably two weeks; the process of actually making the screen and printing the shirts took two days. There are lots of great step-by-step tutorials online (we used this one for a general guide, and this video for a more detailed explanation of how to use the contraption known as the "scoop coater"). And the huge plus to our position now, is that we HAVE all the stuff already, so next time we can skip straight to the fun part! If we wanted to print the same design on different shirts, it would be a one-stop process. Even if we wanted to make a different design (David came up with the awesome idea of the chart for the Ethel sweater printed on shirts), we are already all prepared to re-transform our bathroom into a darkroom, and expose another screen.
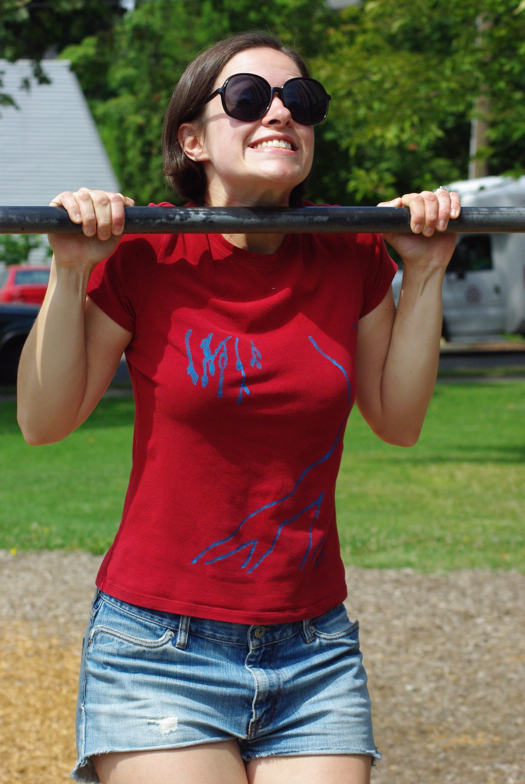
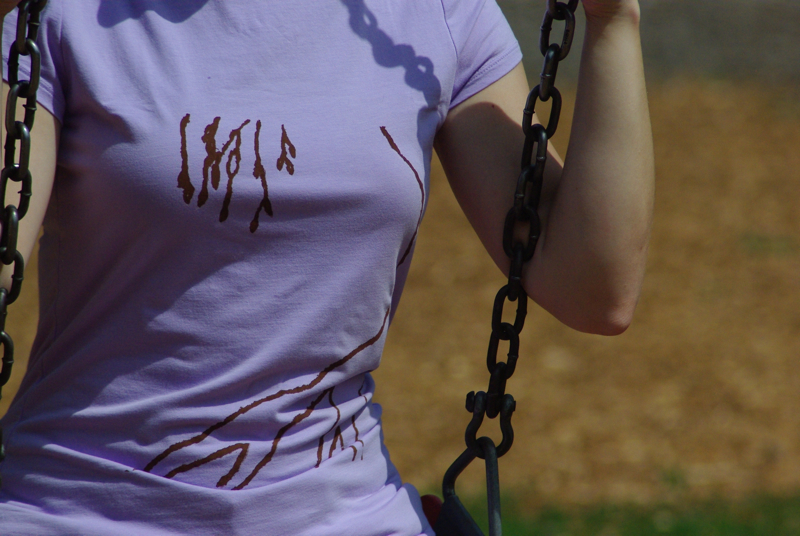
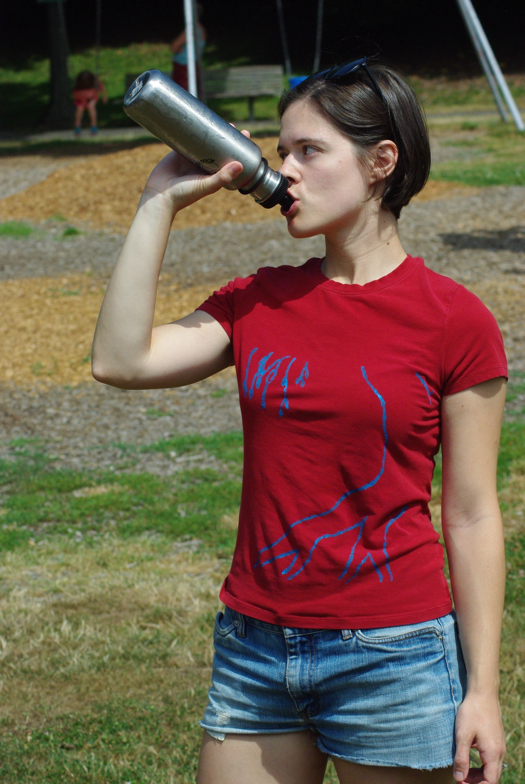
I think these turned out quite cute, especially for our first attempt. The red one with the blue is my favorite, even though the ink is a little more unevenly distributed than on most of the other shirts. As you can see, we did some of the shirts with blue ink and others with brown, and a few of them were darker than ideal for water-based ink (you need a fancy industrial heat-setter in order to use oil-based paint successfully, which is apparently the ideal ink type for printing light colors on dark). But for the most part, I really like them!
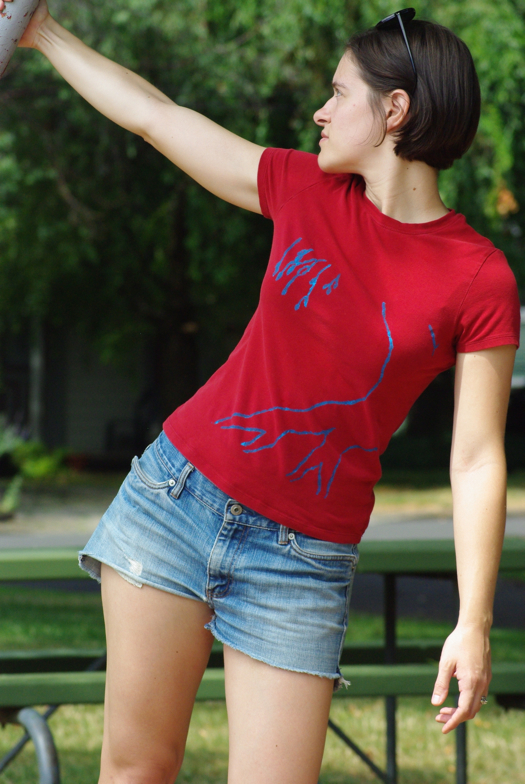
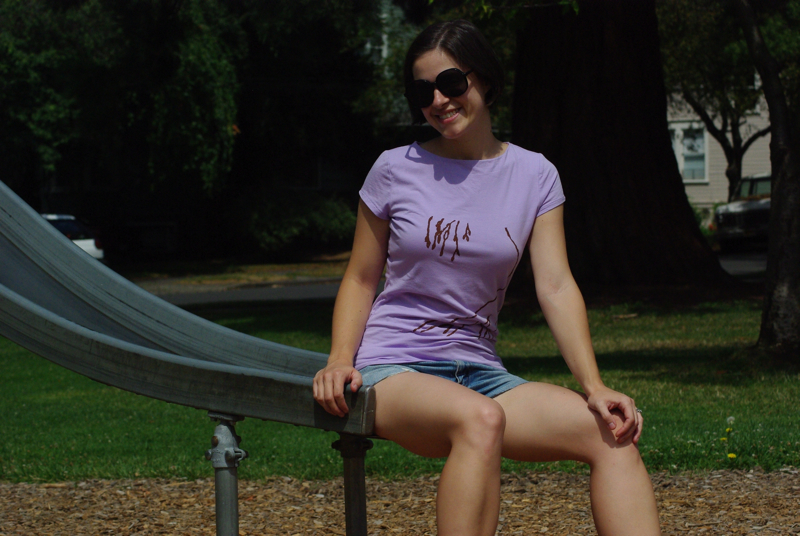
The shirts we used were all pre-owned from Goodwill, but still in excellent condition (I think a few of them were actually unworn). Since we just wanted to stage a little DIY experiment, rather than commissioning a run of three thousand or more, this was the best way to get high-quality shirts in a wide array of sizes and colors. Plus, I like that when I buy used I don't have to concern myself about where the clothes were manufactured, as I would with new shirts. There are lots of combinations I didn't model: I especially love a couple of larger-sized green shirts, printed with brown ink. They look so fresh and clean. The red and lavender two were my favorites that happen to be in my size, but the benefit of thrifting for shirts is that each one is totally unique. Which I think is kind of cool.
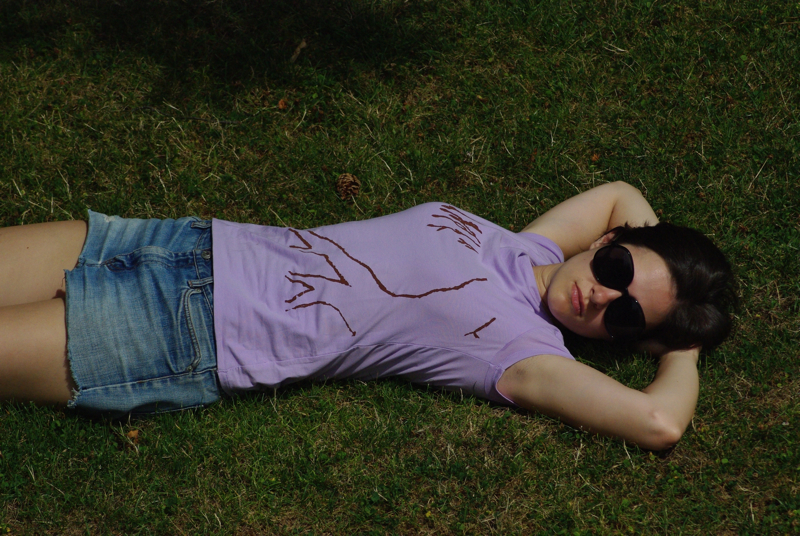
(Here I am looking Super Cool, in the hopes that I can influence the weather.)
Anyway, these were a really fun experiment, and much more suitable to the ultra-hot weather than handling merino or alpaca. We've now got fifteen or so shirts (minus whichever I steal for my own private use - I think the red-and-blue one will have to be in this category), that we'll be selling at the trunk shows in Boston and elsewhere, so if you're interested you should stop on by! They're kind of a celebration of summer. Take them to a playground near you.