June 2010 Archives

Oof! Between the Cold of Death and the lovely Hawaiian honeymoon, I'm so behind on the Influence series! I was going to do separate posts on my thought processes with the sleeves and fronts, but I think I'll combine them into one post. As it turns out, the two are united anyway, by the theme of "things in need of substantial tinkering."

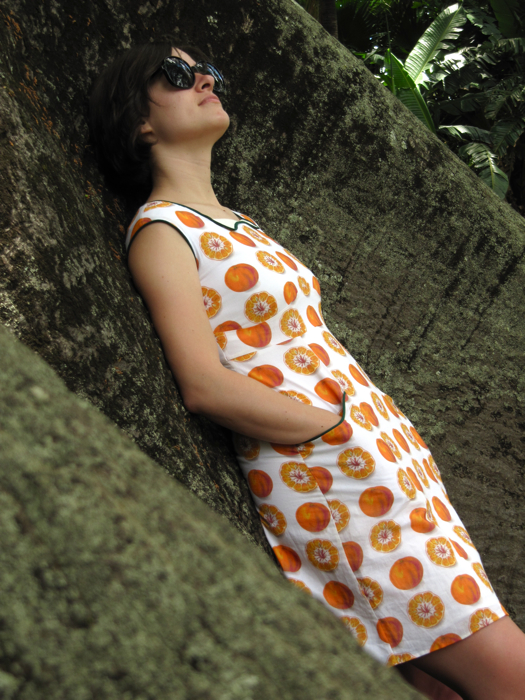
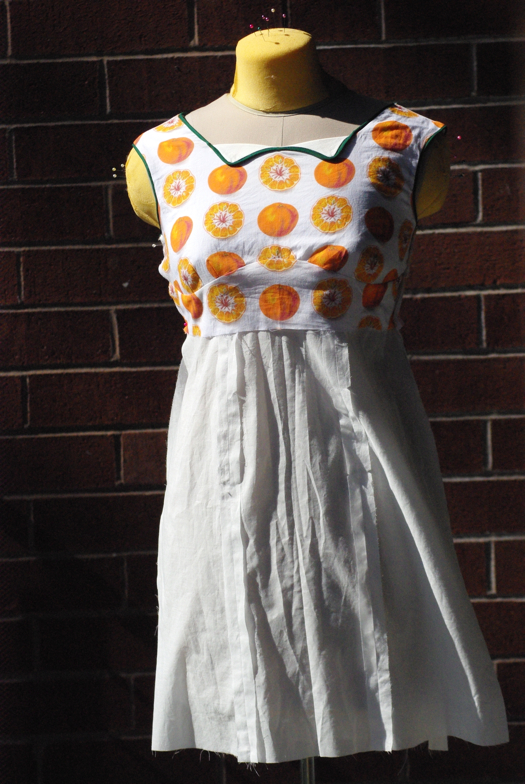
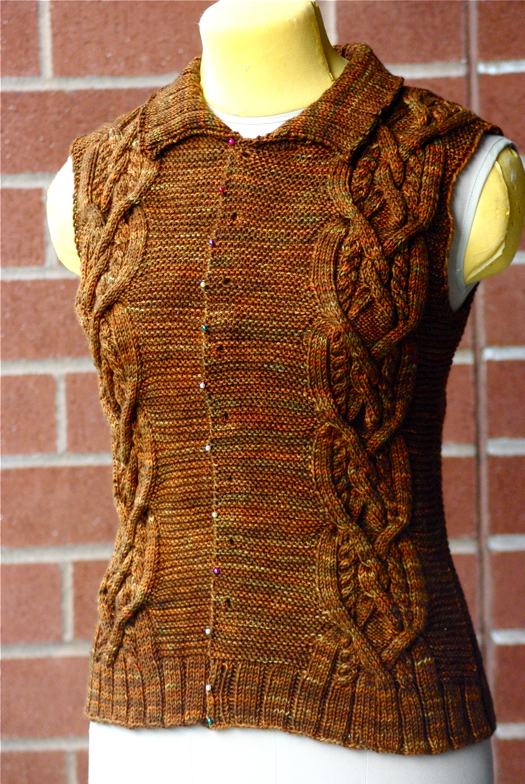
As you'll recall, I'm designing an original sweater influenced by an all-time favorite cardi of mine, my russet version of Kim Hargreaves's Breeze.

breezefront.jpg

As much as I adore this sweater, there are two things about it that have always bugged me. You can see one even on the dress form: the fronts, with their narrow button bands fastened by buttons only about every four inches or so, have always gapped, and the problem has gotten worse with time. I'm sure there are many of you out there who share my hatred of gapping: I definitely wanted to alter the front of my new cardigan to avoid a repeat. Plus, the more I thought about it, the more I felt that a ribbed button band up the front of the sweater would be dwarfed by, and at the same time distract from, the cables on either side—the cables I'm using, after all, are a lot bolder and chunkier than Hargreaves's. Also, my "background stitch" is more textured, and I was afraid that a button band would be one piece of visual stimulation too many.

frontside.jpg

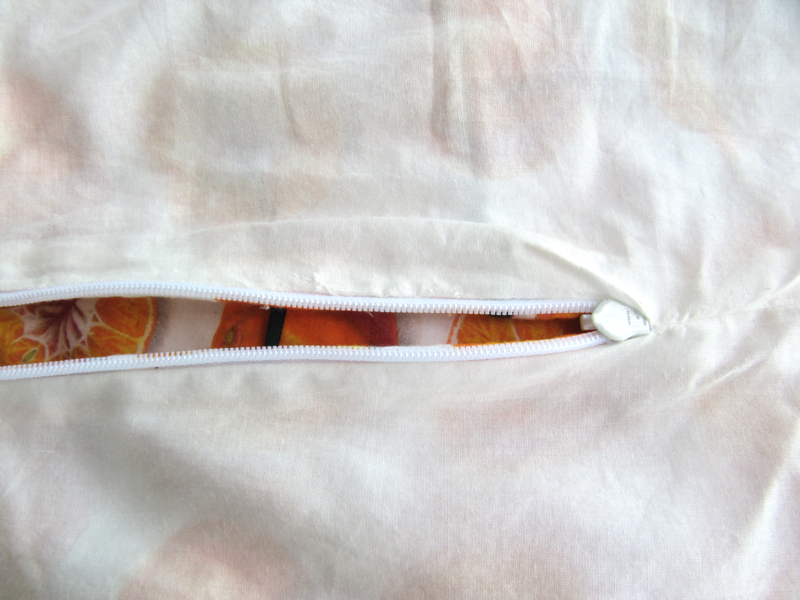
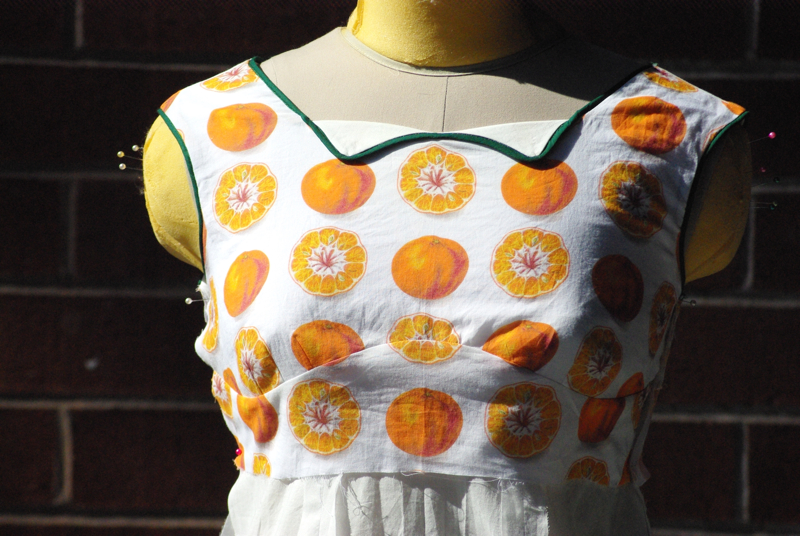
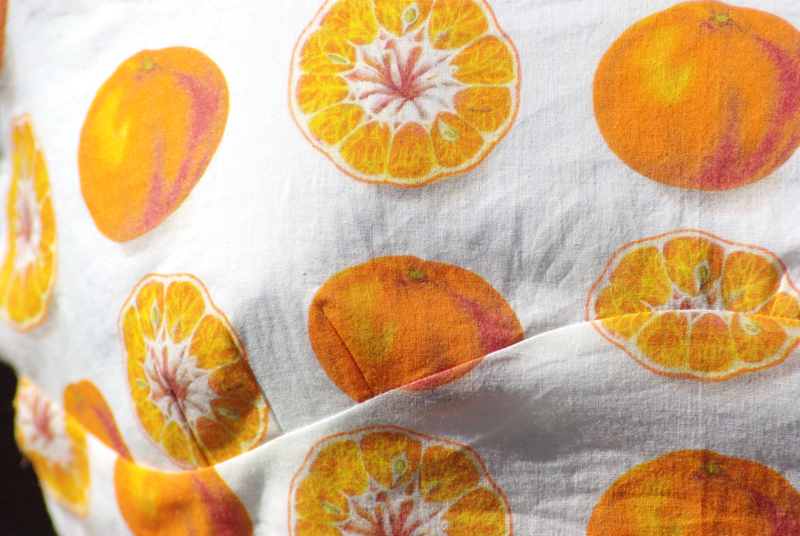
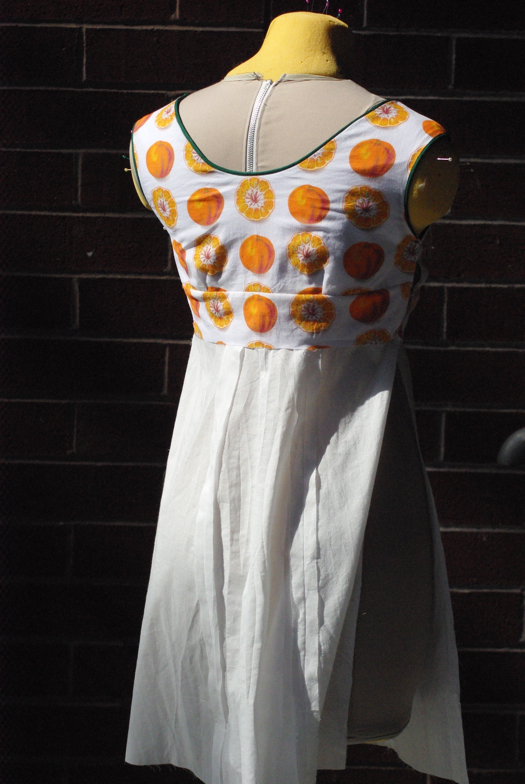
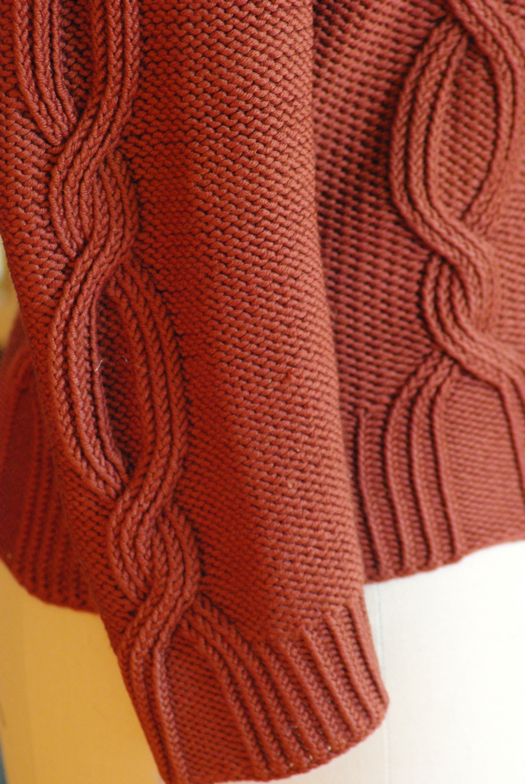
I played around with the idea of a chunky/wide button band, but it just wasn't working for me. In the end I decided to go in the opposite direction: taking my cue from another Hargreaves pattern, the Darcy Jacket, I knit the relatively close-set buttonholes right into the seed-stitch fabric. No bands necessary!

frontfront1.jpg

(Buttons to come soon; you know they'll be cute because they were selected with the help of the awesome Jodi of Green Ray Productions!)

Sleeves are the other part of the original Breeze that always bugged me: they were about an inch shorter than I'd really like, and quite wide. I made that sweater before I understood what a simple mod sleeve-lengthening is, or I would have changed it in the beginning. In addition to longer sleeves, though, there was another issue.

breezesleeve.jpg

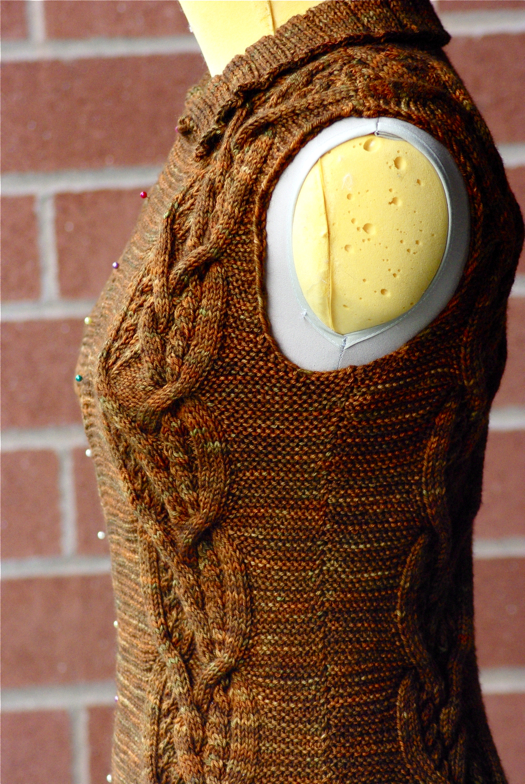
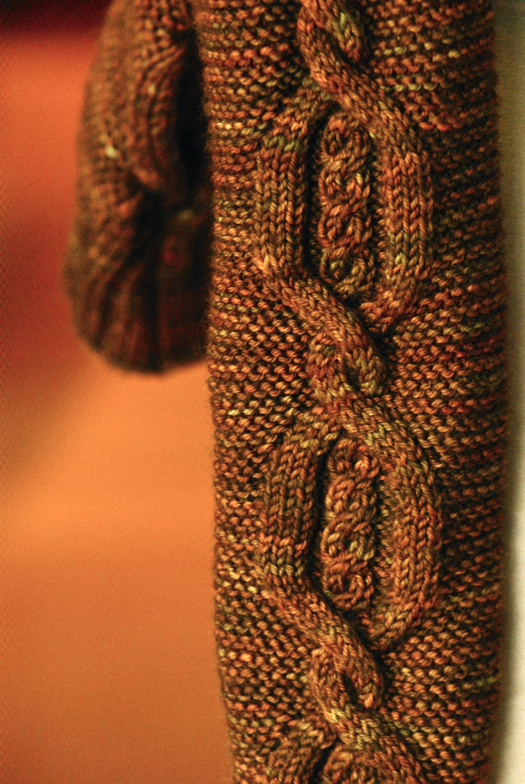
As you can see, the original sweater uses the same cable motif on the sleeve as it does on the fronts and back. My cable motif, though, is just too huge to look good on your average sleeve. I decided to take the general cabling "moves" present in the main cable, and design a smaller version appropriate for sleeves. This is what I came up with:

sleevemiddle.jpg

I think it looks like it "belongs," while taking up significantly fewer stitches. I do love the transition from ribbing to cabling in Breeze, and adapted my sleeve ribbing accordingly:

sleevedetail.jpg

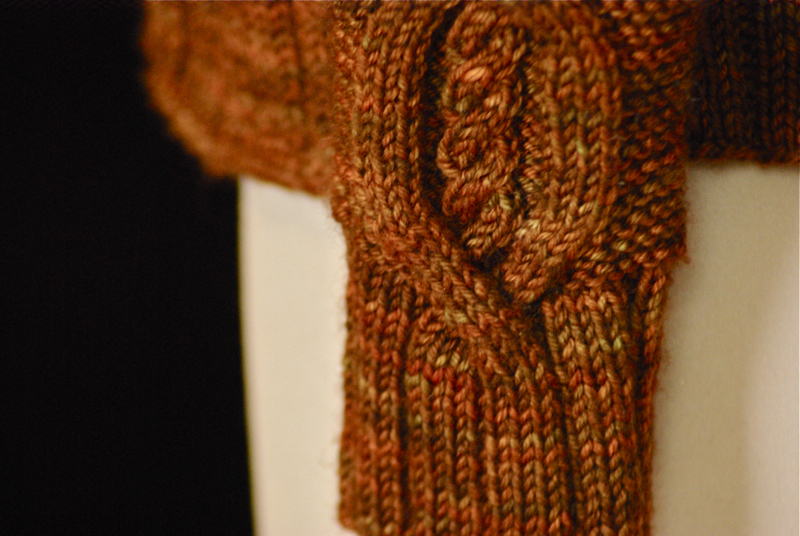
It doesn't have that beautiful flowing elegance of line that Hargreaves's has, but I'm pleased with it. The one thing I regret about the sleeves on my new sweater is that I had to make them narrower than I would have liked: between the garter stitch background and the heavy cabling, my six skeins of Madelinetosh DK were consumed at an alarming rate, and the colorway is (of course) unmatchable these days. So I had to scrimp a little bit on the sleeve width. When I write up the pattern, though, it should be easy enough to add a few stitches on either side of my sample numbers.

And speaking of the pattern: any ideas on what it should be called? I've been trying to come up with some kind of riff on "Breeze" (Gale? Typhoon?), but I can't say I've had much of a brain-wave yet. I'd be happy to pay you in patterns for The Right Name!

Up next: the finished product!

Green tangerine

| 46 Comments | | »>
tanhere.jpg

A big hello from beautiful Oahu! David and I are having a fantastic delayed honeymoon here; lots of reading, relaxation, snorkeling (for David) and beach reading (for me). This won't be a super-long blog entry, but I wanted to get some pictures of the finished Tangerine Rooibos dress up. David was kind enough to snap some shots of it for me yesterday, when we visited the Foster Botanical Garden in downtown Honolulu.

tanfunny.jpg

I'm really happy with how this turned out. One always has to pick one's matching battles when working with a print, especially on a pattern with as many curved seams as Rooibos: there's just no way to match across every seam. But I like the way the pattern "reads" almost interruptedly down the center middle, how it's centered left-to-right (love that single cross-section between the points of the collar!), and I'm especially chuffed with how the cross-section parts match at the top of the curved waist inset, and how the whole tangerines match across the tops of the pockets.

tantorso.jpg

I remain totally sold on piping. So easy and cute, and I think, with this dress in particular, it really helps to define some of the pretty lines that might otherwise get lost in the print—particularly the pockets, but also the cute little collar.

tanfrond.jpg

As I mentioned, I did a full lining rather than the recommended partial facings, since otherwise the cotton lawn would have been a little bit too revealing for my taste. Here's the behind-the-scenes inside-out shot:

tanlining.jpg

You can see in this photo that I cut the same pattern piece in shell, lining, and interfacing, then interfaced the lining before sewing all the same darts in the lining as I did in the shell. Below the bust there's no interfacing; I just put together the lining as directed for the dress, and attached as directed for the facings. I also attached the lining to the invisible zipper after installing it in the shell, which makes the whole thing feel very fancy and finished, and makes me happy whenever I wear it:

tanzipper.jpg

Well! This is turning into a long blog entry after all, and I have a beach to lounge around on! I'll leave you with a final profile shot (you can see that not everything could be matched as nicely as the front):

tanside.jpg

And, for a little perspective, here's the tree against which I'm leaning. Amazing!

tanscale.jpg

Dainty inspiration

| 15 Comments | | »>

Shortly after my last post I came down with the Horrible Cold of Doom, which knocked me out all last week and is still making me feel unpleasantly logey. For part of it I couldn't even concentrate well enough to knit or read, which is pretty much the last sign of abject misery as far as I'm concerned. All I was up to was trolling mindlessly around the internet, looking for blog entries that weren't too taxing to my besotted brain. During that time, I bookmarked this entry on the Colette Patterns blog, in which Sarai invites folks to submit mood boards illustrating how they might make up her new lingerie patterns (the winner gets a $75 gift certificate!). When I was feeling marginally better (e.g., up to arranging pretty pictures on a blank canvas) I returned to the task and whipped up two of these. Making mood boards is a total time suck, but also so much fun that I often forget I haven't ACTUALLY created a garment when I get done with one. (As always, click to enlarge.)

Mood_Board_1.png

(Photo credits: Nathalie Bearden photography; Udessi; Furniture and Design; Colette Patterns. The shot of the stool with the bird decals has been sitting on my hard drive for years; I failed to track down its source.)

You could put together a surprisingly modern, clean camisole from the romantic Cinnamon pattern: matte textures instead of shiny, orange under-bust inset in a white cotton lawn background, with orange or teal straps and a little bit of modern bird embroidery off-center toward the bottom edge (think Lotta Jansdotter). Love the white/orange/teal combo.

Mood_Board_2.png

(Photo credits: Shorpy, Shorpy, Binbin.net, Colette Patterns. Ditto to the lovely calligraphic chalkboard (?) image; I saved it years ago and can no longer track it down.)

Or, a more predictable but slightly racier option for the Nutmeg set: black silk with gold lace (and/or embroidery?), à la old-fashioned vaudeville halls. Something to glint in the flickering candle-light!

Is anybody else putting together boards for this? I love seeing different takes on the same theme.

Citrus love

| 30 Comments | | »>

Well, I fell off the Me Made May wagon for the second half of the month there, when my photographer left town and I was slightly under the weather. I have some sweater knitting to share, but I wanted to jump in and show you the in-progress project I'm most excited about at the moment:

tangbodice.jpg

In two weeks David and I are taking our delayed and highly anticipated honeymoon to Oahu, and one of my favorite ways to savor pre-trip anticipation is to make a new piece of clothing to wear on vacation. In this case, I wanted a new, clean little sundress, and I'm psyched about how my choice is turning out. It's a modified version of the Rooibos dress from Colette Patterns, and right there I already feel great about it because I've been meaning to try out Sarai's line of patterns forever and I'm finally getting around to it. Gotta share the Portland love whenever possible! I must say, I love the pattern: graded for a huge number of sizes, sews up smoothly and without any unpleasant surprises. The styling of this dress is very three-dimensional: lots of darts and curved seams, coming together in a way that seems a little different than most other, commercial patterns I've worked with. I like it! Plus, it's made me a total convert to piping: easy, cute, fun. What's not to love?

tangfront.jpg

I'm making this dress in a much lighter fabric than the pattern calls for: a cotton lawn print from Spoonflower called Best Tangerine. The same designer has avocado and peach prints; I really dig the retro botanical vibe combined with the fresh, clean white backgrounds. I would seriously order three yards of each if only I could afford it.

The lawn base is gorgeous—soft, light, and airy—but it's also fairly transparent, so I'm altering the pattern and doing a full lining instead of the partial bodice facings recommended. What you see extending below the bodice is the cotton batiste lining, which I worked up while the Spoonflower fabric was being shipped to me, helping to cut my impatience. As you can see, I sewed the lining with regular seams, but the lawn is finer than the batiste and I'm working it in French seams throughout, which is always exciting to me. Quite a bit more work, but when I see the neat, clean finished product with all seams encased, I must admit it's a bit of a thrill.

tangdetail.jpg

It's super-easy to modify this pattern to be fully lined: I just set the facing pieces aside and cut out lining pieces for every piece included in the dress (lightly taping the upper and lower side-front skirt sections together to make a single piece, since I don't need pockets in my lining). I cut back and front upper-bodice pieces out of a light interfacing and fused it to my lining fabric before sewing the darts. Interfacing the whole upper section means there's no visible line where the facing piece leaves off (something I would worry about otherwise), and also that my bra won't show through the finished garment. I sewed the lining according to the instructions for sewing the dress, and more or less followed the instructions for working with the facings, except that I put together the entire front and entire back of the lining before joining it to the outer shell. Hopefully I won't run into any issues when I go to install the invisible zipper, but barring that it's been totally smooth sailing.

tangback.jpg

Memorial Day Weekend was typically gross here in Portland, but having this cheery project to work on, and a vacation to look forward to, has really raised my spirits. I may still be wearing sweaters, but at least I can sew sundresses!

Archives